Strawbale Power Shed
Click on individual pictures to see larger image.
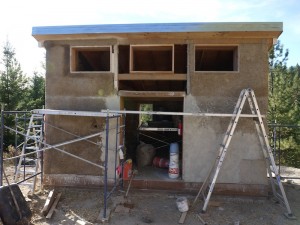
A smarter person would have started work on the back of the building, and done all sampling there, too. However, the back of the building is accessed via a ladder scaffolding overhanging a rather steep drop, so I began on the front righthand side, and worked my way counterclockwise to the front left. I’ve also started my finish plaster sampling on the front (that’s the lighter splotchy stuff on either side of the door).
If you look carefully at the left corner of the building, just under the scaffolding, you can see a smoother bit that is the patch I made to replace the 2 foot long section of plaster that fell when the excavator ran into the side of the building. The hole in the middle of the left side is where I will put a wine bottle “window” when I get home and finish the pinot gris that’s in the second bottle, and get the glass cut.
Before I could leave to the Complex Weaver’s Seminars, I had to finish the base plaster, which I did on all parts of the exterior, with the exception of the front above the door. As you can see, there will be a third window above the double door, but I didn’t have any wall to which to plaster, so that will happen next week, along with continuing the finish plaster (which I expect will go quite quickly).
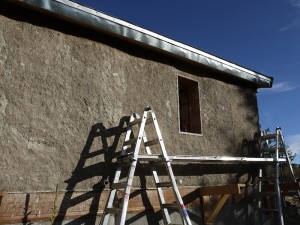
The window here seems ever-so small, but it’s large enough to climb through quite easily (or to set four 2-gallon buckets in the frame — though not both). I was very happy to have made it across the wall — from there, the remaining two walls were so much shorter. (Also, not pictured, the scaffolding is ladder scaffolding, because full-size scaffolding won’t fit on the very small ledge that is immediately before the drop-off down the hill).
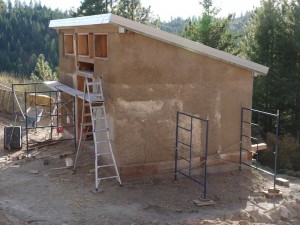
I did quite a bit of experimenting on this side of the building, too. You can see a number of different plaster colours (there are 4 major kinds of dirt on the site, and I was trying to determine which might work best). My inlaws also dug out a bit of their crawl space (too sandy), and I dragged some extremely heavy water-soaked clay that I dug out from the banks of the creek (not clayey enough to make it worth the hassle). The rather unfortunate experiment with wheat paste (hideously stinky — attempted to cover with shots of clay slip) is also visible in this picture.
The thing I find most worrisome in this picture is the crack toward the left side of the wall. It mirrors one we found in the foundation, and I am concerned that it’s there because of a transference. It does now seem to be as deep as the plaster, but I was still developing my technique of keying the different batches together, and I’m pretty sure that the fault line is between two sections. If push comes to shove, I’ll chip it out, and start again, but I’m hoping to repair it with a small amount of plaster and move on to do the inside.
Recipes for the plasters and tips coming up in a post soon. I’d hoped to do it during downtime to the conference, but apparently the photos that I thought were on the laptop are actually on the server, and the ones I can see on my computer are just ghostly images with which I can do nothing.


